![]()
![]()
![]()
![]()

![]()
![]()
![]()
![]()
Hey guys! So I have to share another DIY post with you guys. As you know, when I’m not blogging about fitness stuff, I’m working on flipping houses to rent. I’ve turned myself into quite a little real estate investor lately and I’m the type of girl who loves to get her hands dirty with some DIY projects.
As I’m getting ready to move across the country, I am trying to spruce up a house so I can get it rented before I leave.
When I bought this house the bathroom was a project that we never really got around to. It’s pretty outdated but the floor tile is just totally nasty ass. No matter what cleaner I use on it, the grout lines just look gross.
I found this stuff and figured it was worth a shot….
![]()
![]()
![]()
![]()

![]()
![]()
![]()
![]()
It’s called Grout Refresh by MAPEI. I got the color white even though our current grout was a nasty dark color. I think the tile in this house is original from the 50’s. No joke. Who knows what color the grout was when it was new but I’m guessing it sure wasn’t this nasty color it is now!
Well…I’m so glad I gave this stuff a chance…Here’s why…
![]()
![]()
![]()
![]()

![]()
![]()
![]()
![]()
Basically this whole DIY project took me about about two hours. All you need is a toothbrush and a rag.
I started in one corner of the bathroom and squeezed a fine line of grout “paint” on the existing gross grout and then use a toothrbush to spread it all over each line.
Again..here is the nastiness of the bathroom before…
![]()
![]()
![]()
![]()

![]()
![]()
![]()
![]()
Don’t be afraid to go outside the lines and get a bit messy. Make sure to get enough paint on every bit of grout line.
![]()
![]()
![]()
![]()
![]()
![]()
![]()
![]()
The directions say to wait about 30-60 minutes after applying the paint so it can dry a little. Then you mist it with water, wait 5 minutes and wipe up any paint that was on the tiles.
I’ll be honest, I made a huge mess, waited 30 minutes and then just used a damp rag to wipe up the access with a little bit of elbow grease.
It worked!
![]()
![]()
![]()
![]()

![]()
![]()
![]()
![]()
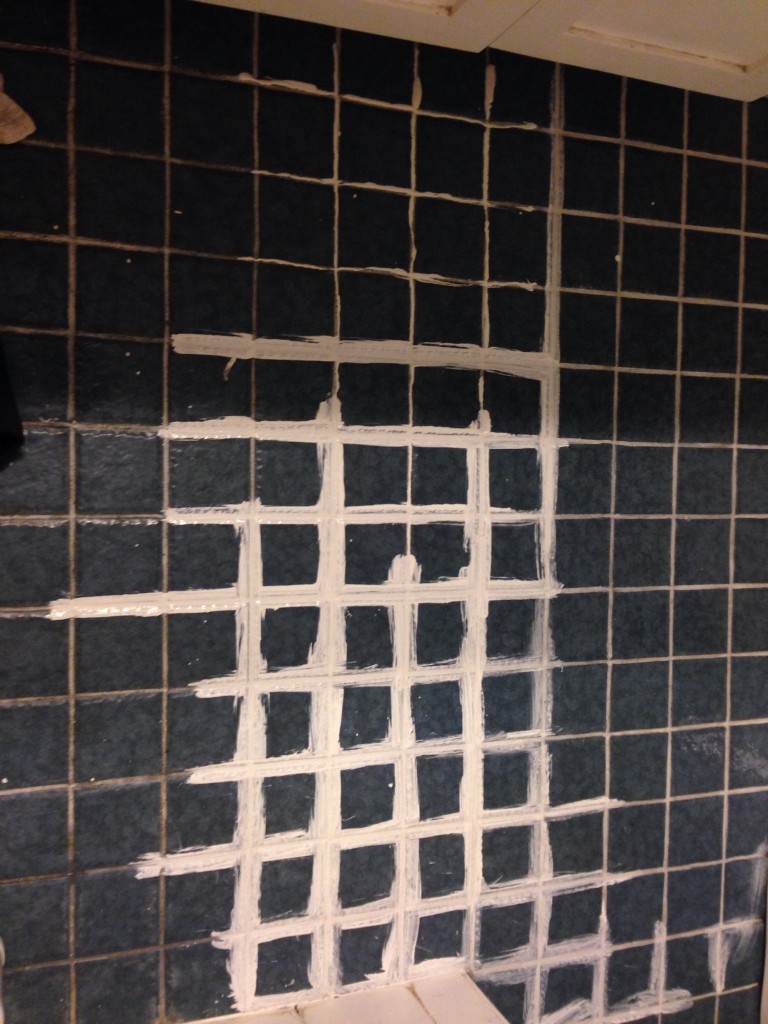
Here is a picture from half way through my little DIY project so you can see the difference. I did half of the bathroom at a time. If they were bigger tiles I could have done the whole thing faster (by tip-toeing between the lines) but I was trying to be careful to not step on the wet grout lines.
![]()
![]()
![]()
![]()

![]()
![]()
![]()
![]()
For around $11 I’m going to say that this was one of my best ideas so far. Nothing is better than a drastic difference for a small amount of money!
![]()
![]()
![]()
![]()
![]()
![]()
![]()
![]()
What do you think? Have you ever tried MAPEI Grout Refresh? Leave a comment below!
![]()
![]()
![]()
![]()

![]()
![]()
![]()
![]()
First off, I have to say, nothing I’ve ever used on tile grout has ever worked. The fact that you’ve shown with photos that are undeniable, something I probably never would have looked twice at in a home improvement store, impresses most certainly.
Second, you do realize that the two hours of “elbow-grease” you’ve put in here counts toward fitness posts also right? That’s no easy job, from someone who has had to do so before many times, scrubbing, re-grouting, or painting tile grout especially tiny tiles, is a workout all by itself.
Third, maybe it’s just the viewpoint from the lens of the camera but that bathroom looks huge! More photos of the nice place?